

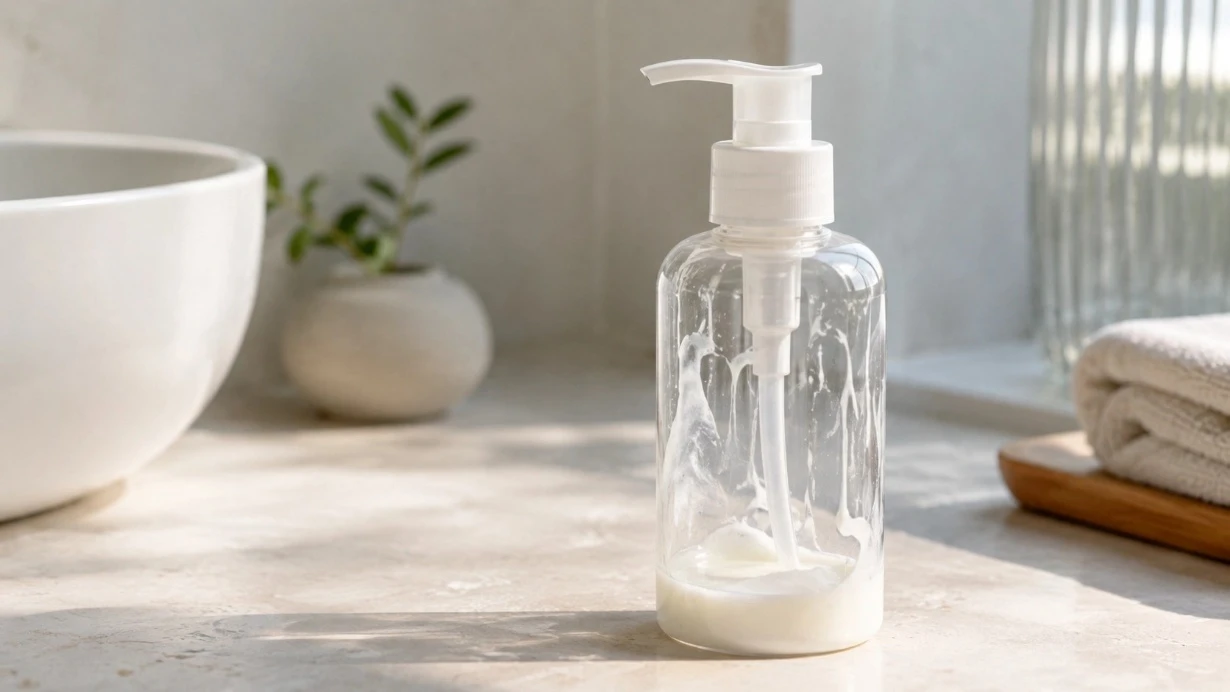
Your lotion pump has stopped dispensing, but the bottle is clearly not empty. You can still see product at the bottom or coating the inside walls.
Start with the least invasive option. Turn the bottle upside down and give the lotion time to move toward the opening. If the pump still cannot reach it, remove the pump and pour out what remains, or use a clean, dry cosmetic spatula if the formula is too thick to flow.
Do not add water just to thin the lotion. The U.S. Food and Drug Administration (FDA) advises consumers not to add water to cosmetics because doing so can introduce microorganisms and dilute the preservatives intended to control microbial growth.¹
The best method depends on the bottle and the formula.
Looking at this from a beauty brand or packaging perspective?
Quick answer: what is the best way to get the last lotion out?
|
Bottle type |
Best first method |
Best suited to |
Main caution |
|
Pump bottle |
Turn it upside down, then remove the pump if needed |
Low to medium viscosity lotion |
Keep the pump and opening clean |
|
Squeeze bottle |
Store cap-down and squeeze toward the opening |
Formulas that move under pressure |
Cutting should be a last resort |
|
Wide-mouth bottle or jar |
Use a clean, dry cosmetic spatula |
Thick lotions and creams |
Avoid introducing water or dirty tools |
|
Rigid bottle |
Remove the closure and transfer the remaining product |
Lotion that cannot be squeezed toward the opening |
Product may remain around the base or shoulder |
|
Airless pump bottle |
Check priming and normal pump operation first |
Products designed for an airless dispensing system |
Do not puncture the package as a first response |
If you only want to recover the last few uses, start with the table above. The methods below explain what to do in more detail.
7 safe ways to get lotion out of a bottle

Use the simplest method that works. Most bottles do not need to be cut, punctured, diluted, or exposed to strong heat.
1. Turn the bottle upside down
Close the bottle securely and leave it upside down so gravity can move the remaining lotion toward the opening.
This works best when the product still flows reasonably well. A light lotion may move fairly quickly, while a dense cream will usually move more slowly.
If the bottle cannot stand securely on its cap, use a stable holder rather than balancing it against another object.
2. Remove the pump
If the pump no longer reaches the product, unscrew it on a clean surface.
Tilt the bottle over a clean container and allow the lotion to drain if the formula still flows. Avoid aggressive shaking, which gives you little control over where the product goes.
Keep the bottle opening and pump clean if you plan to reinstall the dispenser.
If the lotion is too thick to pour, use a spatula instead.
3. Use a clean, dry cosmetic spatula
A narrow cosmetic spatula can reach lotion sitting on the bottle wall or around the bottom when the neck opening is large enough.
Use a clean, dry tool. FDA consumer guidance recommends keeping cosmetic containers clean and washing hands before using products where direct contact with the container may occur.¹
A spatula is especially useful for thick formulas that no longer move easily under gravity.
4. Transfer the remaining lotion to a clean container
If the dispenser is no longer useful, transferring the remaining product can make it easier to finish.
Use a clean, dry container with a secure closure. Do not pour lotion into a container that still contains rinse water, and do not mix unrelated products simply because both packages are nearly empty.
5. Use a bottle stand or compatible emptying cap
Some accessories hold bottles upside down so gravity keeps the product near the outlet.
They can be useful for flowable lotions and bottles with compatible necks or closures. They are less useful when the formula is extremely thick, and they will not repair a pump with a mechanical problem.
6. Use mild warming only when the product and package allow it
Gentle warmth can help some thick lotions flow more easily, but heating is not a universal solution.
If the product manufacturer permits it, placing a closed bottle briefly in mildly warm water is more controlled than exposing an unknown cosmetic package to intense heat.
Check the product instructions and packaging material first. A bottle may contain a pump, liner, adhesive, label, decoration, or other component that reacts differently from the main container material.
7. Cut a disposable plastic bottle only as a last resort
Cutting open some flexible plastic packages can provide access to product that cannot otherwise be reached, but it also destroys the original package.
Do not try this with glass, brittle plastic, or packaging that can create dangerous edges.
Use clean tools, protect your hands, and transfer the exposed product into a clean container that can be closed.
Once the package has been cut open, it no longer protects the formula in the way it was designed to.
Three methods worth treating with caution
Some common tips make lotion easier to remove by changing the formula or damaging the package. In most cases, a less invasive method is available.
Adding water
Adding water may make lotion appear thinner, but it also changes the formula.
If dispensing is the problem, change how you access the lotion rather than changing the lotion itself.
Microwaving the bottle
Microwaving is difficult to recommend as a general method because a cosmetic package contains more than the bottle body.
The formula, closure, pump, liner, decoration, label, and adhesive may not respond to heat in the same way. Heating can also be uneven.
For that reason, microwaving should not be the default response to a lotion that has become difficult to dispense.
Piercing the package
Adding a hole to the bottle damages the original package and creates another route for contamination.
It may not solve the reason the lotion is difficult to remove either.
For a conventional pump bottle, removing the dispenser or transferring the product is normally a more controlled approach.
Why is there still lotion in the bottle when the pump stops working?
If one of the methods above solves the immediate problem, you may not need to know anything else.
For anyone wondering why it happens repeatedly, the answer usually involves how the formula moves inside the package and how the dispensing system picks it up.
The dip tube collects product from a limited area
Most conventional lotion pumps use a dip tube with an inlet positioned near the bottom of the bottle.
As the fill level drops, lotion may remain on the sidewalls, around the shoulder, or in parts of the base that do not drain efficiently toward that inlet. Turning the bottle changes where the remaining product collects, which is why gravity sometimes gets the pump working again.
Making a dip tube longer is not a complete solution by itself. The formula still has to move toward the pickup point.

Thick lotion moves slowly

Viscosity describes how readily a material flows.
A light body lotion and a dense body cream can behave very differently inside the same type of package. High viscosity formulas tend to move more slowly and may cling to bottle walls or remain in areas the pump cannot easily reach.
For consumers, this explains why turning a bottle upside down sometimes requires patience.
For packaging developers, it also explains why an empty package sample cannot show how the package will perform with the finished formula.
Bottle shape affects where lotion collects
Bottle bases, shoulders, corners, and changes in wall angle influence the path a viscous product takes as the package empties.
Product left behind after normal dispensing is commonly discussed as residual product.
The useful question during packaging testing is not whether any residue exists. It is how one package performs against another when both are tested with the same formula and under the same conditions.
Rigid bottles give the user fewer ways to move the formula
A flexible tube can be squeezed and progressively flattened. That pressure helps push product toward the outlet.
A rigid pump bottle does not collapse in the same way. Once the remaining lotion moves away from the pump's pickup area, opening the bottle may be the only practical way to reach it.
That difference becomes more important when a brand starts comparing packaging formats rather than trying to empty one bottle at home.
Why packaging affects how much lotion is left behind
For a consumer, leftover lotion is an inconvenience. For a beauty brand, the same complaint appearing across many units deserves attention during packaging development.
The question becomes: how does the package perform from the first use to the last?
If the package also shows poor priming, leakage, weak output, or other dispensing symptoms, use our dispenser troubleshooting guide to separate a product-evacuation problem from a pump or sealing problem
Formula viscosity and the dispenser need to work together
A package should be evaluated with the formula it is expected to dispense.
A light lotion may move readily toward a pump inlet. A dense cream can move more slowly, coat the sidewall, or require different dispensing characteristics.
Choosing a package from an empty sample or catalog image tells you very little about this part of its performance.
Before approving a package, run the intended formula through the actual dispenser. Check priming, normal dosing, repeated use, and what happens when the fill level gets low.
Pump and dip tube design affect end-of-use performance
A lotion pump has to do more than fit the bottle neck.
It must pick up the formula, move it through the dispensing system, deliver the intended dose, and continue working as the package empties.
Dip tube position determines where the pump collects product. Formula behavior determines how readily more product moves toward that point.
Testing only the first few pumps from a full bottle can miss a problem that appears near the end of use.
Container geometry deserves attention during sampling
Different bottle shapes create different internal flow paths.
A curved base, broad floor, narrow shoulder, or pronounced transition can change where lotion collects. The effect becomes more noticeable with viscous formulas.
There is no bottle shape that guarantees low residue for every lotion.
A more useful approach is to fill candidate packages with the same formula, use them under the same conditions, and compare what remains once normal dispensing stops working effectively.
Flexible tubes and airless systems solve different problems
A squeeze tube allows the user to apply direct pressure to the package, which can help move viscous products toward the outlet.
An airless package uses a different dispensing mechanism from a conventional dip tube pump. Depending on the design, it may offer a different approach to controlled dispensing.
Neither format is automatically better.
Formula compatibility, target dose, user handling, filling requirements, decoration, cost, and positioning still have to be considered.
Pump bottle vs squeeze tube vs airless bottle
For a brand, product evacuation is one selection factor among several.
|
Packaging |
Thick formula handling |
End-of-use considerations |
Dispensing experience |
Common reasons to consider it |
|
Conventional pump bottle |
Depends strongly on pump and formula compatibility |
Product can remain away from the pickup point |
Controlled pump dispensing |
Familiar format for body and hand lotions |
|
Often practical when the formula responds well to pressure |
User can push product toward the outlet |
Direct squeeze dispensing |
Portable creams and lotions |
|
|
Depends on the specific airless system and formula |
Should be evaluated through full-use testing |
Controlled dispensing without a conventional dip tube |
Selected skincare and treatment products |

This table is a starting point rather than a selection rule.
A thick lotion does not automatically require a tube, and an airless package does not guarantee complete evacuation.
Testing the finished formula in real samples gives a development team more useful information than choosing by package type alone.
For beauty brands: check residue before production
The best time to discover an evacuation problem is before a large production run.
Test the finished formula in the intended package
Do not approve a lotion dispenser from an empty sample alone.
Fill representative packages with the intended formula and run them through normal use. Check:
- initial priming
- dose consistency
- repeated dispensing
- performance as the fill level drops
- product remaining when effective dispensing stops
A pump that behaves well with water or a light test medium may behave differently with the finished lotion.
Evaluate product evacuation consistently
You do not need to invent a universal "acceptable" residue percentage to compare packaging options.
Start with a known fill amount. Use each candidate package under the same test conditions, then measure or document what remains when the package no longer dispenses effectively.
Consistency matters more than a subjective comment such as "this bottle seems easier to empty."
If Package A and Package B are filled with the same lotion and tested using the same method, the comparison gives the development team something it can act on.

Include realistic use and storage conditions
A package that performs well during a short bench test may behave differently after repeated use.
Testing should reflect how the finished product is expected to be handled and stored. Orientation, repeated dispensing, and relevant storage conditions can all be included.
For microbiological protection, ISO 11930:2019 provides a framework for interpreting preservation efficacy testing and microbiological risk assessment for cosmetic products.³
For products placed on the EU market, Regulation (EC) No 1223/2009 requires the Cosmetic Product Safety Report to address matters including product stability, microbiological quality, preservation challenge testing where applicable, and relevant characteristics of the packaging material.⁴
These references do not tell a brand whether to choose a pump bottle, tube, or airless system. They support a broader development principle: the formula and package should be evaluated together as parts of the finished cosmetic product.
Compare candidates before tooling or mass production
If several packaging systems could work, compare them while changes are still relatively easy to make.
Run the same lotion through the candidate packages and review dispensing consistency, residual product, filling compatibility, closure performance, user handling, and presentation requirements.
The final decision may involve trade-offs. A package that empties efficiently may not deliver the target dose or appearance. A visually strong package can still be a poor match for the formula.
Sampling makes those differences easier to see before production.
If you want to select the right lotion for your brand, please read the article below:How to Choose the Right Lotion Bottle for Your Formula and Market
When should you stop trying to recover the remaining lotion?
Do not keep using a product simply because some lotion remains in the package.
Check the product instructions and stop using it if you notice a marked change in smell, color, or texture, visible contamination, or damage that has left the package compromised.
A nearly empty bottle is not automatically usable just because product is still visible.
Frequently Asked Questions
Q: How do I get thick lotion out of a pump bottle?
A: Turn the bottle upside down and give the formula time to move. If that does not work, remove the pump and use a clean, dry cosmetic spatula if the opening allows access. Avoid adding water just to make the lotion thinner.¹
Q: Can I add water to lotion to get the rest out?
A: FDA advises consumers not to add water to cosmetics because it may introduce microorganisms and dilute preservatives.¹ Remove the pump, use a clean tool, or transfer the remaining lotion without changing the formula.
Q: Is it safe to microwave a lotion bottle?
A: Microwaving should not be treated as a general lotion-emptying method. Cosmetic packages contain different materials and components, and FDA advises protecting cosmetics from excessive heat because heat can affect product condition and preservative performance.²
Q: Can I cut open a lotion bottle?
A: For a cuttable disposable plastic package, opening it may be a last-resort way to reach the remaining product. Avoid glass and brittle containers. Use clean tools, protect yourself from sharp edges, and transfer the exposed lotion into a container that can be closed.
Q: Why is lotion left at the bottom of a pump bottle?
A: Lotion can collect in parts of the bottle that do not drain efficiently toward the dip tube inlet. Higher viscosity formulas can make this more noticeable because they move more slowly.
Q: Do airless bottles leave less product behind?
A: Airless systems use a different dispensing mechanism from conventional dip tube pumps, but residual product still depends on the specific package and formula. Brands should compare filled samples rather than assume that an airless system guarantees zero residue.
Q: What type of packaging is best for thick lotion?
A: There is no single best format based on viscosity alone. Pump configuration, tube design, airless system characteristics, target dose, filling process, user expectations, and formula behavior all matter. For a new product, test the finished lotion in several suitable packages before making the final selection.
Final takeaway
If your goal is to recover lotion from one bottle, start with gravity, remove the pump, or use a clean, dry tool. Avoid changing the formula simply to make it easier to pour.
For a beauty brand, recurring residue should be investigated during package development. Test the finished formula with the intended dispenser and continue the test into the later stages of use. That is where differences in viscosity, pump design, bottle geometry, and packaging format become easier to see.

References